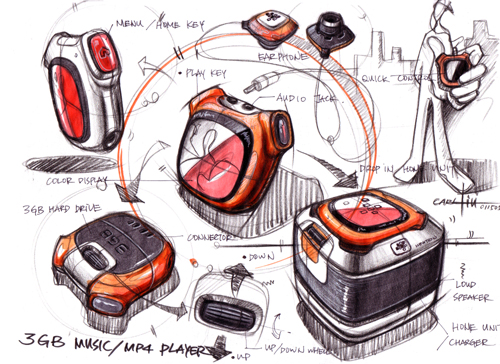
 点评此图
点评此图
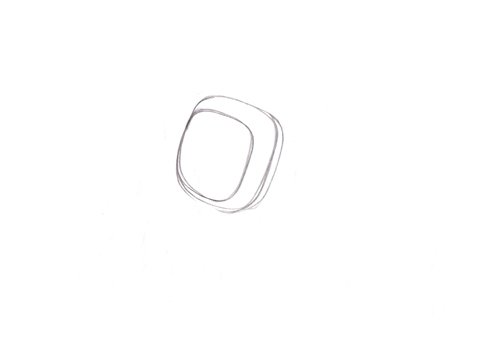
第一步apply light pencil stroke to give basic design and position on the page. (用铅笔轻轻的在纸上画出大概的图案和位置)
 点评此图
点评此图
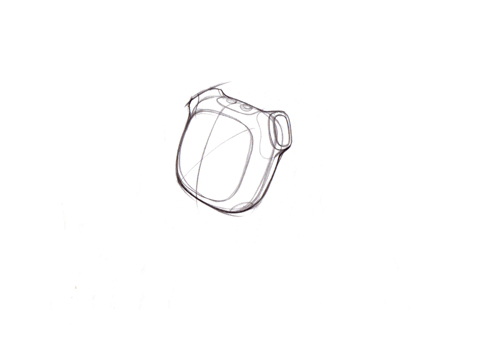
第二步 refining the shape of the object. (修饰物体的图形)
 点评此图
点评此图
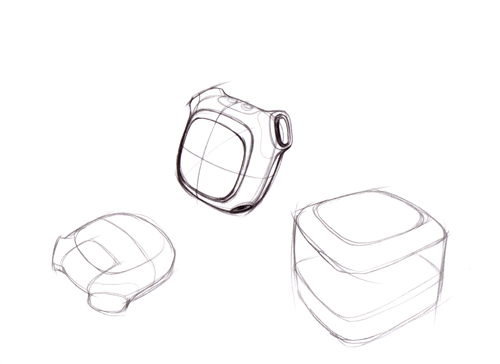
第三步
apply heavier pencil stroke when design is confirmed. Then repeat the step 1 for other views.
(当设计确定时 加上粗的铅笔线条 然后重复同样的步骤 在其它角度的草图上)
 点评此图
点评此图
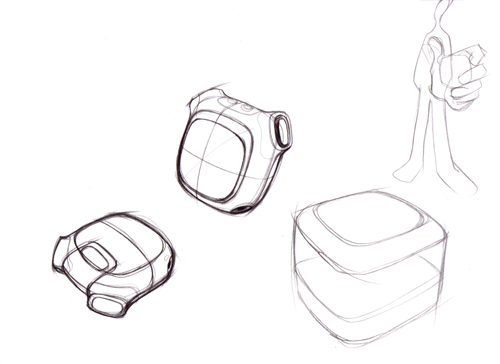
第四步
lay in more design content..
(加多一点东西…)
 点评此图
点评此图
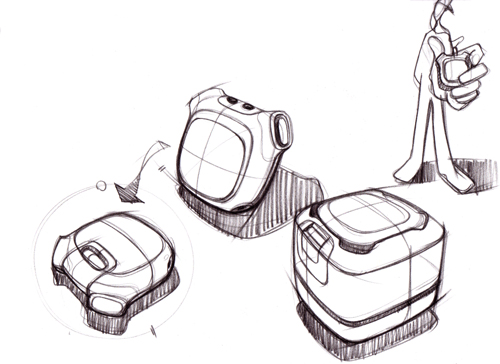
第五步
a little guy for showing how to use the object.
(画一个人 解释如何去使用这个产品)
 点评此图
点评此图
第六步
give shadows to make the drawn object jump out the page.
(加上阴影 让图更跳)
 点评此图
点评此图
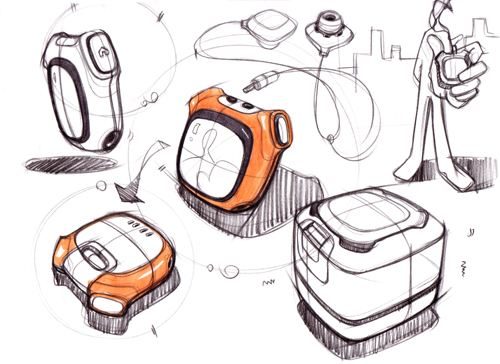
第七步
apply heavy line weight to trace the light sketch.
(再加上重线条在之前的草图上)
 点评此图
点评此图
第八步
more details..
(加细节…)
 点评此图
点评此图
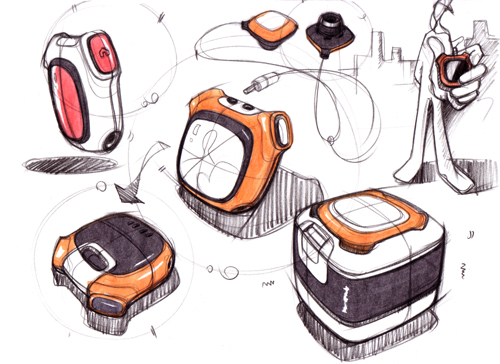
第九步
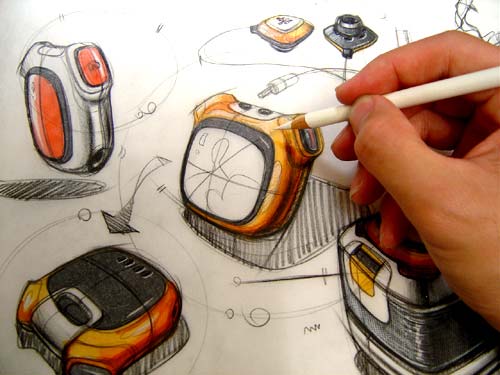
marker color in on the back of the tracing paper.
(把麦克笔上在描图纸的背面)
 点评此图
点评此图
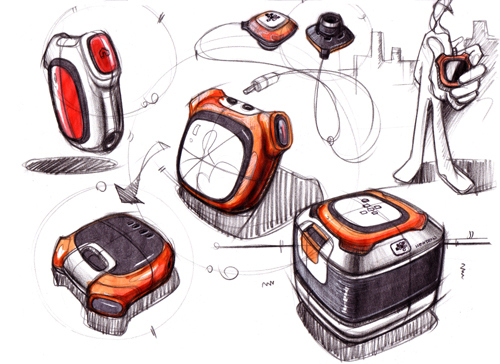
第十步
Keep fill in color form the back of the tracing paper.
(继续在描图纸的背面上 涂上其它的颜色)
 点评此图
点评此图
第十一步
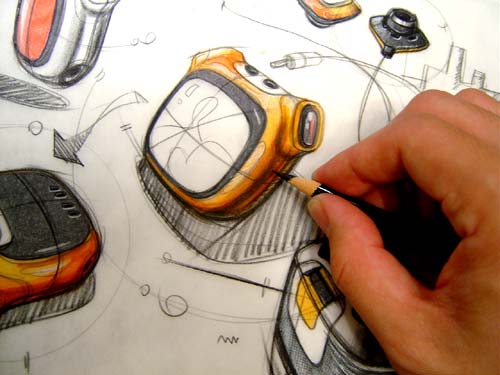
Black and white prismacolor pencils give dark cores and high light on objects.
(用黑色和白色的色铅笔 在物体上画出光影和阴影)
 点评此图
点评此图
第十二步
add call-out to explain the design intension.. Sign and then finish.
(加上批注 解释设计的意图 签名 然后就完成)
 点评此图
点评此图
追加(after scenes):
如何上麦克笔在描图纸上
P1_ marker color in on the back of the tracing paper.
(在描图纸的背面上麦克笔)
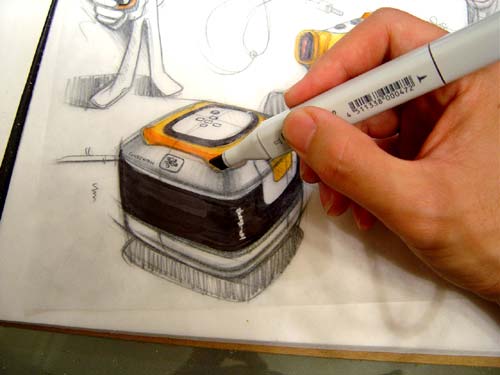 点评此图
点评此图
P2_ keep using makers on the back.
(继续上麦克笔在描图纸的背面)
 点评此图
点评此图
P3_ put a mesh underneath the page for speaker texture.
(把网眼垫在描图纸的背后 用来画出喇叭布的质感)
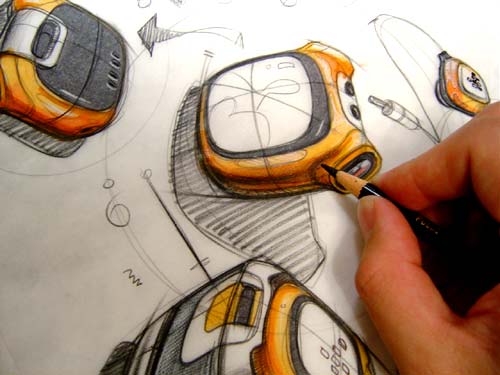 点评此图
点评此图
P4_ hold pencil side ways to apply dark cores.
(斜斜的抓笔 来画出阴影)
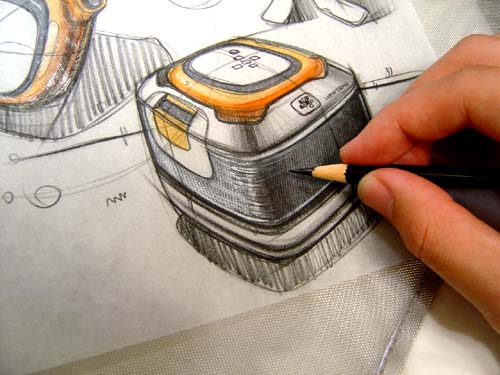 点评此图
点评此图
P5_ add shadows on objects.
(加上影子在物体上)
 点评此图
点评此图
P6_ white pencil to give high light and part lines.
(用白色的色铅笔 加上光影和分模线)
 点评此图
点评此图
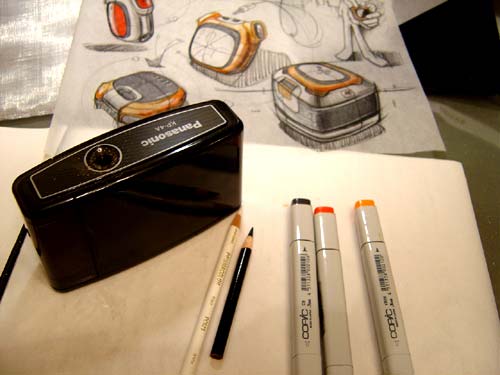
P7_ Material and tools. always remember to keep the pencil sharp.
(材料和工具 永远记得削尖铅笔)
 点评此图
点评此图
17赞 5评论 3291人气

17赞 3评论 3176人气

2赞 3评论 2131人气
0赞 4评论 2020人气


 关注
点赞
收藏
关闭弹幕
留言
关注
点赞
收藏
关闭弹幕
留言
确认要删除该条评论吗?
小小心意,大大鼓励
最高赞赏200元
使用支付宝扫描二维码完成支付
使用微信扫描二维码完成支付
当前余额:¥0.00
支付操作会向你普象账户的注册手机号发送验证码
请注意查收

扫一扫添加
普象商务
扫一扫添加
客服微信

扫一扫下载
手机APP

请关注公众号iamdesign或扫码关注
 沪公网安备 31011502009179号
沪ICP备13011487号-2 上海普象文化传播有限公司
沪公网安备 31011502009179号
沪ICP备13011487号-2 上海普象文化传播有限公司
厉害
这个人好厉害,而且她的书好好
学工业设计时的启蒙大师